When I was a kid learning about engineering and electronics, the magazines that we read in the pre-internet days were full of articles, projects, and kits promising hours of enjoyment and even the proposition of making money from our favorite pastime.
Electronics kit building kind of fell out of favor during the computer age as the home based technology enthusiasts moved to assembling PC’s, and software development. But home brew electronics has enjoyed a resurgence in recent years in what is now called the maker community. Internet electronics stores such as Adafruit and Element 14 are enabling 21st century geeks to build anything from simple circuits to complex embedded computing projects. These sites provide documentation, tutorials, video channels, and of course, a store, where you can purchase the tools and components required to internet enable your toaster, or feed your cat from the couch.
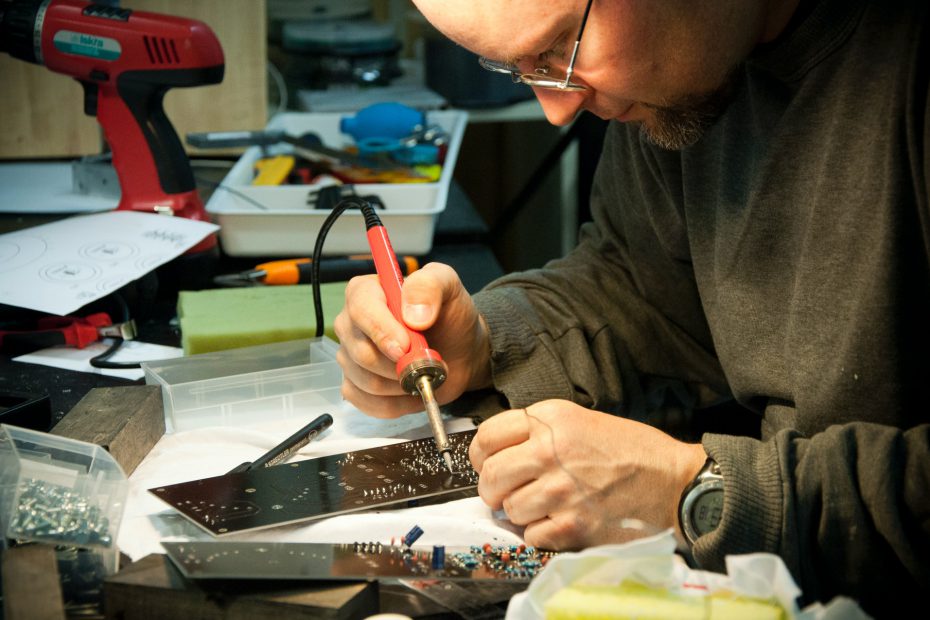
Guitar effects pedals are a great way to get started with electronics. The simplest ones only require some basic skills to assemble. The few parts can be easily obtained, and the minimum of tools required can be purchased quite cheaply. Better still is the gratification from plugging it in for the first time and being able to incorporate a pedal that you made yourself into your music. With the skills you acquire, you can graduate from simple to more complex projects; maybe build an entire pedal board of your own effects. Your friends might ask you to build pedals for them too. What you learn can also be put to use with commercial pedals, as you will better understand how they work, and will be able to repair and hot rod old pedals. If you are interested in working at a repair shop, as a guitar tech, or for an electronics company in the future, your portfolio of home built pedals will be a great advertisement for your skills.
The entry point for guitar pedal self-assembly is the effects pedal kit. A lot of the work such as designing and manufacturing the circuit board, drilling the enclosure, and selecting suitable parts has already been done for you. With a little care and careful following of the instructions, there’s no reason not to have a first time success with a pedal kit.
Pedal Kit
For: Beginner to intermediate
Requirements: Soldering iron, solder, pliers, cutters, small screwdrivers
Key Benefit: High chance of first time success
Resources: buildyourownclone,, modkitsdiy
Get started
Choose a pedal kit or two from one of the kit suppliers. If you are new to this, start with one of the simpler kits such as a boost pedal. You can move on to more complex circuits such as delays and reverbs later. You can order multiple kits at once if you want, but learn your skills on the easy ones first. Good kits come with comprehensive documentation. They normally list the tools that you will need, so read the docs online first and make sure you have the tools available. If not, order them at the same time as your kits so you’ll have everything ready. It’s very irritating when you are keen to get started on a pedal project and are missing that one small tool or part.
If you are new to electronics, the essential tool you most likely need to buy is a decent temperature controlled soldering station. A basic one such as a Weller WLC100 can be had for less than $40 and will do the job just fine. Really nice ones with digital temperature readouts from Weller or Hakko are $100-$150 and as much as you will ever need for a home pedal shop. The soldering pencils have interchangeable tips, so you can keep a selection of different sizes. The one that normally comes with a new station will be suitable for most through-hole pedal kits.
Make sure you have a sharp pair of wire cutters and a pair of those pointy nose pliers for bending and cutting component leads. Don’t forget solder too. There are a whole bunch of solder specifications covering materials, size, process etc. You’ll need rosin core solder. It comes in different thicknesses. 0.031” diameter is a common size, and will work for most pedal projects. Solder is normally sold in reels by weight. A 1/4lb reel will be enough to last a good few pedal projects. Lastly, get lead free, no clean solder. Although not strictly necessary for personal projects, lead-free solder is common now and safer. No clean, means that you can leave the flux residue behind without having to clean it off, and it won’t damage your board.
If you have little or no experience in electronic assembly, there are some great free video tutorials on the web. In particular check out Adafruit learn, and search Collins Lab on Youtube. These include fun and informative tutorials on components and soldering. Watch these before you attack your first board with a hot iron.
Now you should have all you need to assemble your first effects pedal. Make sure you have a clean, well-ventilated area to work. Wash your hands before you start. If you’d like, wear some conductive nitrile gloves. Avoid handling components any more than necessary. Contaminants on the components and PCB will make them harder to solder and can cause reliability problems. Certain IC’s can be damaged by static electricity from handling. Solder is hot and creates dangerous fumes so be careful. Follow the instructions carefully, in particular making sure you insert components in the correct places and the correct way around. Many components look alike and some are polarity sensitive, so take your time to get it right. Solder one pin of a component and then double-check it before soldering the rest. It’s much easier to move or remove a component with only one lead soldered to the board.
The tip of a soldering iron is very hot, around 700F, and can damage the board, component packages, and wire insulation in a fraction of a second, not to mention your own skin, so be careful the tip does not touch anything as you move it in and out of the soldering area. Put the pencil back in its holder when not soldering. Don’t leave a hot iron laying on a bench or table.
Once everything is assembled, check through the instructions one last time for any additional notes on connections, power etc (don’t waste all your hard work by blowing up the board with the wrong power supply). Then plug in your pedal and give it a try. There’s a good chance it will work first time. If not, go through the instructions again step by step and look to see where the problem might be. Missed, incorrect, or reversed components are the most common causes and can be diagnosed just by checking each step carefully.
After your experience with a kit or two, you may want to make a few changes.
Project Board
For: Intermediate to advanced
Requirements: As above plus digital multi-meter, digital calipers, drill and drill bits, hook-up wire, wire strippers
Key Benefit: Customize with your own parts
Resources: AMZ, Smallbear, Pedalpartsplus
Get started
Sooner or later you may want to experiment further: What happens if I use a different opamp here, or change a capacitor value there? Specifying your own components is the next step. Two of the specialty jobs in building a typical effects pedal are the design of the circuit itself, and the production of the printed circuit board (PCB) on which to install the components. The next logical step from a kit is to order a pre-built PCB and then customize the component and enclosure choices yourself. AMZ effects, is the go-to place for a huge variety of pre-designed PCB’s. The cost is quite low and the projects include clear documentation providing guidance on different options and components.
You’ll need to get yourself setup with an account on some of the web stores selling components such as effects pedal specialty stores listed above, and some general component stores such as Mouser and Digikey. AMZ provides a list of the components required for each project. Make sure you check carefully the component requirements such as type of capacitors. Many components may have suitable electrical values but different physical layouts, so use the datasheets for your chosen component. Measure the spaces and holes on your PCB to make sure the components will fit. Remember that you’ll also need an enclosure in which to install the finished circuit and don’t forget things such as knobs, battery holders etc.
If you think you might build more than one of a pedal, it’s helpful to keep a list of your preferred parts and their specifications in a spreadsheet. In manufacturing this is called a BOM (Bill of Materials). Some online stores will let you import a BOM direct into their web store and will build a purchase order for you based on the information. It’s a big time saver each time you need to order parts, and lets you compare different vendors stocks easily.
Design Your Own
For: Advanced
Requirements: PCB Design Software
Key Benefit: Complete control
Resources: Eagle, Circuit Maker, KiCad
Get started
Designing your own pedal from scratch requires some experience in electrical engineering, but it’s not especially hard or expensive these days to learn from online resources and pickup the tools for low cost or even free.
You’ll need schematic and PCB design software and there are plenty to choose from.
Cadsoft Eagle is a very popular tool with pedal builders. A basic version can be had for free. There are limitations on board size and number of layers in the free version, but these won’t come in to play for the majority of basic analog effects pedals. Element14 includes a host of documents and tutorials. If you get into complex designs or full professional use later, full versions of Eagle, at time of writing cost $575, and $1640.
Altium is known for it’s high end PCB development application called Altium Designer which starts at around $7000 and there’s a yearly subscription fee too. Gulp! Altium Designer is used by many industry professionals for product development. Altium has Circuit Maker available, which has many of the features of Designer and is completely free! The trade off at this point seems to be that it’s designed around a community and apart from a couple of private slots, you have to share your work, so it’s not very useful for completely proprietary projects.
If you want free and private, other than the basic version of Eagle, there is KiCad, which is an open source tool developed by GIPSA Lab, which is a research institute out of Grenoble in France. Like Eagle, there are Windows, Mac, and Linux versions, whereas Circuit Maker is Windows only. There are also tools now being offered for free by some of the big component dealers such as Mouser.
I’ve used Eagle for a long time, but I just recently started using Circuit Maker, and I like it so far. I’ll probably end up using both since I do most of my work on a Mac, and Eagle still works fine on that. I had to set up a dedicated Windows machine for Circuit Maker. Circuit Maker has a 3D view of the finished PCB which is a very helpful tool if you are dealing with odd board sizes and very constrained layouts.
Free to use schematics to get started can be had from the web but remember, if you are going to use someone else’s work, either completely or as a starting point for your own design, check first to see what copyright and any other terms are associated with it. If it’s not clear, ask first. There are plenty of open source designs available to use, but schematics, like other written works are covered by copyright law so check you have permission before using them.
Once you have a board design complete, you can send it out for manufacture. Years ago this used to be the major challenge for the home or small builder, but these days a large number of board manufacturers have a web presence and will quickly fabricate single, or low volume boards for fairly modest cost. Eagle (or whichever CAD software you are using) outputs a set of files called gerber files. These files can be emailed or uploaded over the web to the board manufacturer who will plug these into their manufacturing tools and then send the finished boards to you in the mail.
I’m going to have to check out Eagle and Circuitmaker. Just getting back in to tinkering and always been interested in trying to come up with something new!
A former coworker used Eagle quite a lot and had good experiences. As with anything, your milage may vary now because of supply chain hiccups, but in the past they have been great for reasonably inexpensive prototyping.
If I were to make a career out of building pedals, would I need an electronics engineering degree or would I be better off without one.